sostrades-dev-tools : Setup SoSTrades platform
This repository contains files for local platform deployment, and local for virtual environment creation. It also contains default vscode workspace configuration files.
Feedback is a gift : please note that this installation procedure is still in beta phase. You can contribute to this documentation, give feedbacks and raise an github issue.
Please note that supported operating systems are Linux-based systems, macOS systems, and Windows (through WSL).
1. Choose your installation
Depending on your needs, two different environment installations are proposed. A common setup is mandatory whatever the installation you need to perform.
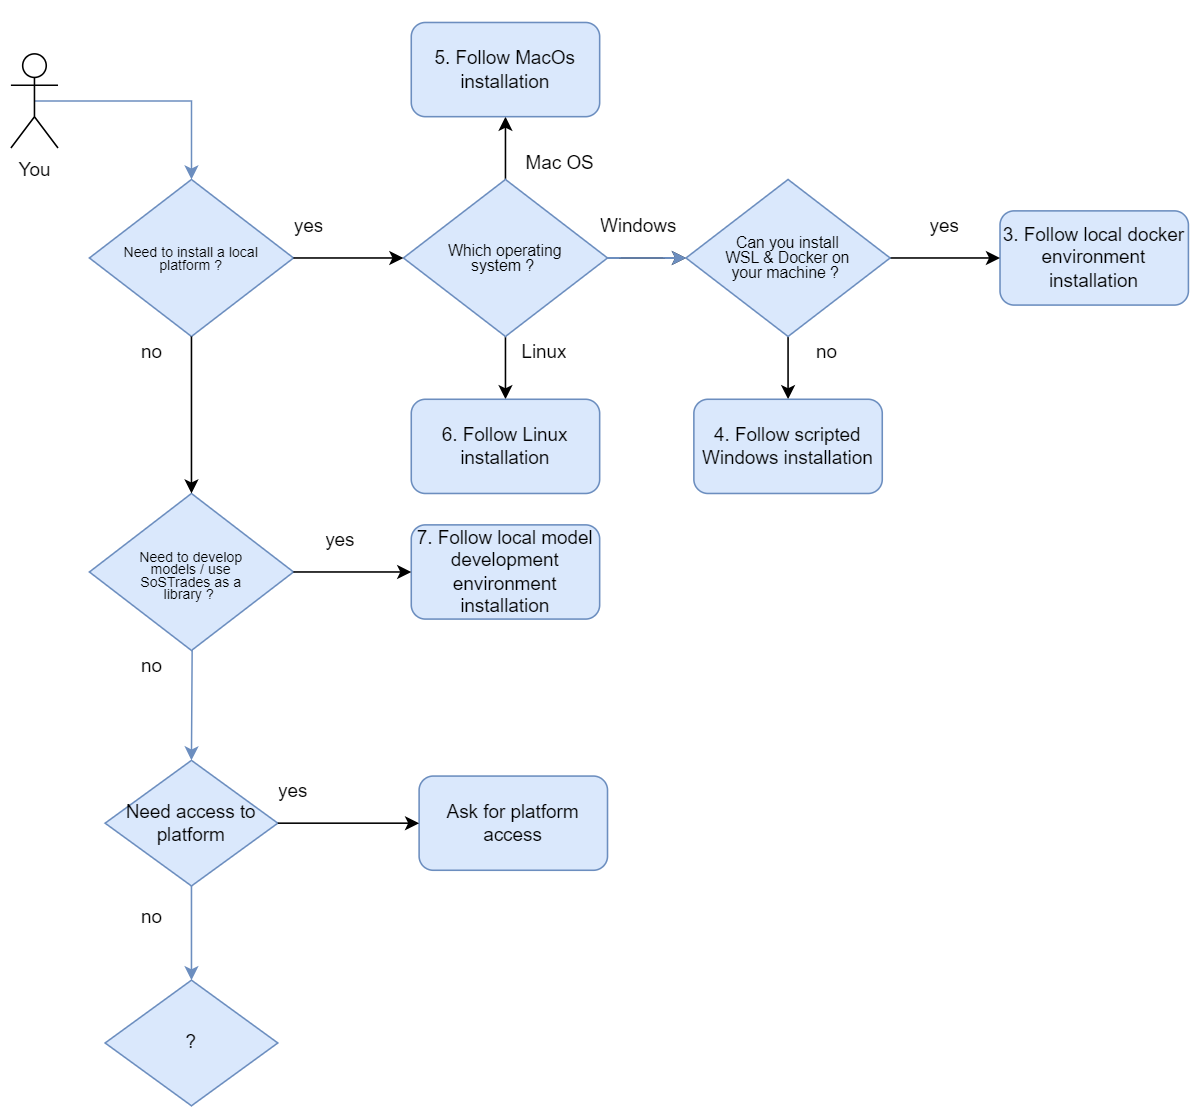
Follow the diagram below to know what you need to install:

2. Common Setup
The objective is to have all folders properly organized on your local computer. Admin rights on your computer are mandatory to ensure a smooth installation process.
The installation procedure is provided for Linux based environments. For Windows users, we recommend to use Ubuntu through Windows Subsystem for Linux (WSL) as described in dedicated section.
2.1 (Optional : Windows users only) WSL and/or Ubuntu installation
Install WSL2 if using Windows
wsl --install --web-download
Install Ubuntu 22.04 LTS
On Windows with WSL2
wsl --install -d Ubuntu-22.04
As an alternative You may use directly Ubuntu 22.04 LTS or an equivalent, in this case you may have to make some changes on you own.
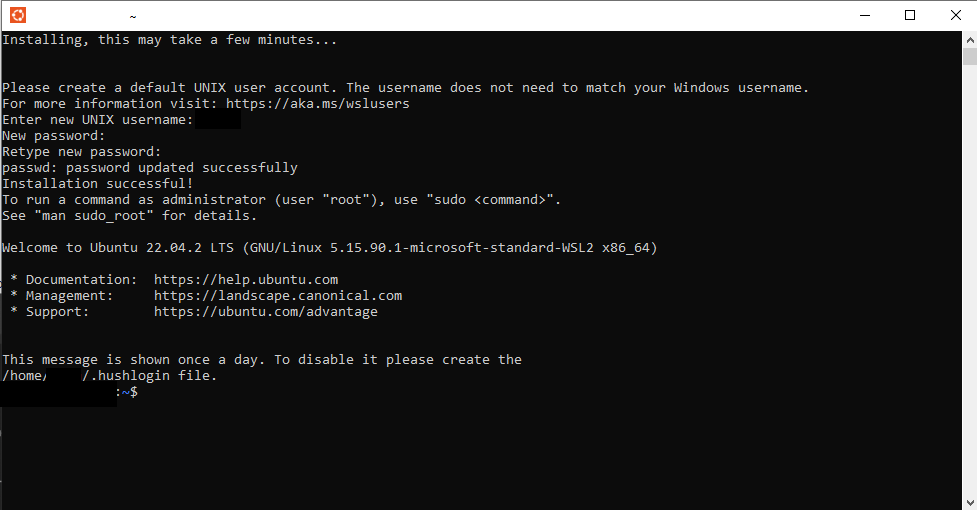
Launch Ubuntu

2.2 Setup prerequisites
Conda installation Check conda installation with
conda info, if not installed do
pip install conda
or
wget https://repo.anaconda.com/archive/Anaconda3-2023.09-0-Linux-x86_64.sh
chmod +x Anaconda3-2023.09-0-Linux-x86_64.sh
./Anaconda3-2023.09-0-Linux-x86_64.sh
# => Accept licence and follow instructions
# Restart terminal for env variables update
Install jq
sudo apt  install jq           #For Debian/Ubuntu
sudo yum install jq            #For Fedora/CentOS/RHEL
sudo pacman -Syu jq            #For Arch
sudo brew install jq           #For macOS
2.3 Clone code and tools
All development environments are built from a dedicated directory initiated with this repository. This directory will be used as root and will contains all the others necessary repositories from OS-Climate. This root directory contains VSCode tasks and launch docker-compose files. This allows to launch SoStrades in docker containers and to debug webapi servers directly from thus container in VS Code. From the repository a script is available to clone all the repositories to prepare the development environment.
Clone this repository in root directory
git clone https://github.com/os-climate/sostrades-dev-tools
(For SSH : git clone git@github.com:os-climate/sostrades-dev-tools.git)

cd sostrades-dev-tools
If needed configure model repositories : edit the
model_repositories.jsonandplatform_repositories.jsonaccording to what repositories you want. The providedmodel_repositories.jsonfile includes the WITNESS model repositories :
[
    {
        "url": "https://github.com/os-climate/witness-core.git",
        "branch": "validation"
    },
    {
        "url": "https://github.com/os-climate/witness-energy.git",
        "branch": "validation"
    }
]
Launch the
PrepareDevEnv.shThis script will prepare the local working directory as follow :
├── sostrades-dev-tools
│   ├── dockers
│   │   └── docker related files
│   ├── models
│   │   ├── witness-core
│   │   ├── witness-energy
│   │   └── Other model repositories
│   ├── platform
│   │   ├── gemseo
│   │   ├── sostrades-core
│   │   ├── sostrades-webapi
│   │   ├── sostrades-webgui
│   │   └── sostrades-ontology
└── other files...
./PrepareDevEnv.sh (if necessary sudo chmod +x PrepareDevEnv.sh to allow execution rights)
The script PrepareDevEnv.sh should not be used again, as it will not be able to override repositories.
3. Local Docker Env Installation
You are a developer and need a local working platform.
3.1 Prerequisites
Follow common setup paragraph :
WSL2 + Ubuntu 22.04 LTS or directly an Ubuntu equivalent
You will need also:
Docker 24.0.4 installed and running with your account (on Ubuntu)
Docker compose 2.17.2 installed (on Ubuntu)
Try running “docker” and “docker compose” to see if command is recognized
docker version
docker compose version

docker ps
If this commands are not working fix docker and docker-compose installation before continuing.
Docker installation tips
Recipe for docker installation is https://www.digitalocean.com/community/tutorials/how-to-install-and-use-docker-on-ubuntu-22-04 Recipe for docker-compose installation is https://www.digitalocean.com/community/tutorials/how-to-install-and-use-docker-compose-on-ubuntu-22-04
A few useful commands :
sudo usermod -aG docker ${USER}to add user to docker groupsudo service docker startto start docker servicesudo service docker statusto check docker statusIf docker sercice stops after a few seconds, check ip tables
sudo update-alternatives --config iptables

(choose 1 legacy uptables)

sudo service docker stop
sudo service docker start
3.2 Visual Studio Code (VSCode) installation
VSCode settings have been written in dedicated files during execution of PrepareDevEnv.sh (in a previous step).
The following command can be run to install VSCode :
sudo snap install --classic code
In order to benefit from VSCode settings, type the following command in the sostrades-dev-tools directory, at the same level than the ./vscode (hidden) folder (or models/ and platform/ visible directories) :
code . &
3.3 Prepare development environment with docker
All the commands below need to be done from the root directory.
Build all docker images
docker compose build
3.4 Start and play with your SoSTrades GUI
Here all commands needed to play with the image built are listed :
First start of your local GUI instance
docker compose up
Wait some minutes
Go to http://127.0.0.1:1080 with your web browser and connect with the following credentials :
login : user
password : mdp
Stop the instance
docker compose stop
Restart the instance
docker compose start
Clean the instance (if errors)
docker compose down
Start the application with debug mode
docker compose -f docker-compose.debug.yml up
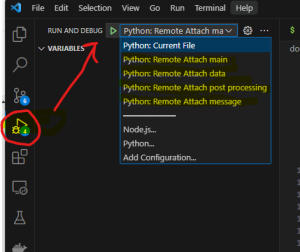
If using VSCode you will find 4 debug profiles :
Remote attach main
Remote attach message
Remote attach post processing
Remote attach data

After having launched each debug profile your application should be available on 127.0.0.1:1080 and you will be able to debug it directly running in the container and from VSCode. All debug profiles must be started since flask api are waiting for debug connection to continue. Then without debug connections platform won’t be responding.
3.5 Useful links
https://code.visualstudio.com/docs/containers/docker-compose
4. Local Model Development Env Installation
The objective is to have a working local dev environment based on a conda venv, with pre-configured VS-CODE workspace to be able to run code and debug. Other IDE may be used but should be configured properly.
4.1 Prerequisites
Follow common setup section :
WSL2 + Ubuntu 22.04 LTS or directly an Ubuntu equivalent,
Conda installed.
4.2 Prepare Conda environment
./PrepareCondaEnv.sh (if necessary sudo chmod +x PrepareCondaEnv.sh to allow execution rights)
4.3 Visual Studio Code (VSCode) installation
VSCode settings have been written in dedicated files during execution of PrepareDevEnv.sh (in a previous step).
The following command can be run to install VSCode :
sudo snap install --classic code
In order to benefit from VSCode settings, type the following command in the sostrades-dev-tools directory, at the same level than the ./vscode (hidden) folder (or models/ and platform/ visible directories) :
code . &
4.4 Use conda env in VS code
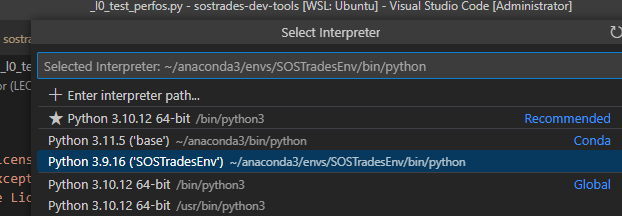
Use keys windows + shift + p to open command panel, search for “Python: Select Interpreter”

Select “Python 3.9.x (“SOSTradesEnv”)

Now you can launch any SoSTrades code from VSCode.